If you know me you know that I love me some Pinterest. In the past I've made many things after being inspired by Pinterest. And this go 'round I decided to get all patriotic and make my version of an American Flag. I saw this beauty at Pottery Barn a while back and admired it through my computer screen because there was no way I was paying $129 for it.
I've had the idea of making it for a few months now but I kept putting it off and telling myself to wait until we move next month before making or buying anything else. But I could no longer resist!
 |
| Source |
I've had the idea of making it for a few months now but I kept putting it off and telling myself to wait until we move next month before making or buying anything else. But I could no longer resist!
So I went to Lowe's and bought 4 furring strips and asked the fine people of Lowe's to cut each of them in half. I also bought three one half pint cans of paint (red, white, and blue), as well as these flush mounting thing-a-ma-jiggers to hang the finished product with.
When I got home I took a furring strip that I already had and cut it in half to use as an anchor for all the other strips. Photos are courtesy of my awesome helper, aka 10 year old daughter, so they are a bit blurry
Then I lined everything up and got to screwin'. Wait, that sounded bad.
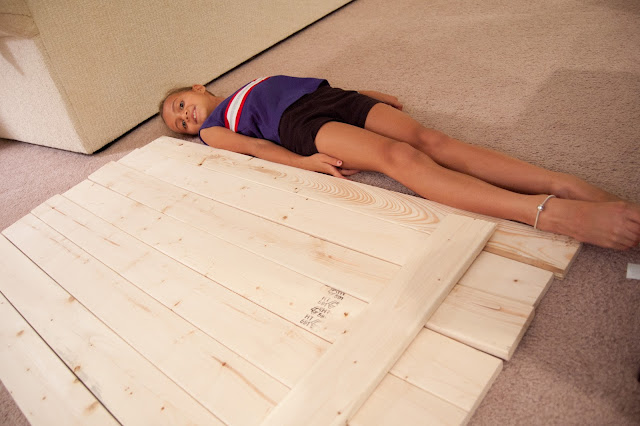
And now we had the flag built. The photo below is of the back of it so that you can see how I used two pieces of a furring strip to hold the whole thing together.
And here's the front. Ariana said, "Momma! Does it look like my head is floating?!"
The flag is four feet long, to give you an idea of how tiny my ten year old is here are a few silly pictures. Oh, and forgive her wild hair and mismatched clothes, we were in 'let's bum it around the house' mode.
After getting all the painting done I sanded the heck out of that puppy. First I was sanding by hand because I was afraid of sanding too much. But then after sanding by hand I realized I loved the super distressed look and it would have taken me far too long to do it by hand so I broke out my lovely sander and went for it. Then, with the help of the kids, we added stars to it. I simply bought a Martha Stewart star punch, used some white contact paper I had on hand and Ari punched them all out for me. Ethan helped me add them to the flag. And here she is all finished:
When we move next month I plan to hang it above Ethan's bed. In the meantime I put it on a blank wall in the boys' room.
So there's my version of Pottery Barn's $129 flag. Mine was under $35. And it was made with the help of my kidlets so that makes it extra special to me.
All my supplies from Lowe's (four furring strips, paint, one pack of flush mount hangers) totaled $22.94, and the Martha Stewart star punch was $11 after a 40% off coupon at Michael's, all the other supplies (stain, brushes, tape, contact paper, sander, screws, etc) I already owned. Not too shabby, eh? Gotta love Pinterest!
Xo,
Lorri


This is awesome! Nicely done!
ReplyDeleteI have made the same flag before using a very similar design. I love mine! Yours turned out great!
ReplyDeleteThanks so much Tracy and Alicia!
ReplyDeleteIt looks great! I'm loving how big it is! That's the one thing about the one I did that disappoints me a bit. My initial vision was a much larger flag, but I ended up working with what I could get my hands on the easiest (and cheapest). Oh well. Nice work!
ReplyDelete